The Science of Art: Finding the ‘Perfect’ Compressor Settings – Every Time

Yes, I do realise that it's been a while since I posted, but I've been very busy recording an album. Isn't that nice?

Anyway, when it comes to compression, the truth is that even some experienced engineers and producers can feel frustrated when trying to set a compressor – especially the attack and release times. A technique popularised by Michael Paul Stavrou in his book Mixing with your Mind (a very expensive but highly recommended book!) helps to overcome this.

The method is simple: using extreme threshold and ratio settings makes it easier to hear the effect of changing the attack and release times. The key step is to first apply the following settings to your compressor:

    •    Attack to minimum
    •    Release to minimum
    •    Ratio to maximum
    •    Threshold giving at least 15dB of gain reduction – preferably more

Loop up a piece of audio, such as a snare sample or drum loop you’re familiar with, and start to adjust the attack time until you can hear the transients poking through, and really understand and get a feel for the way that the attack works on the particular compressor you're using. Try to ignore the distortion and extreme compression and just focus on the attack transients; pay attention to when there's too much 'clamping down' on the transient.

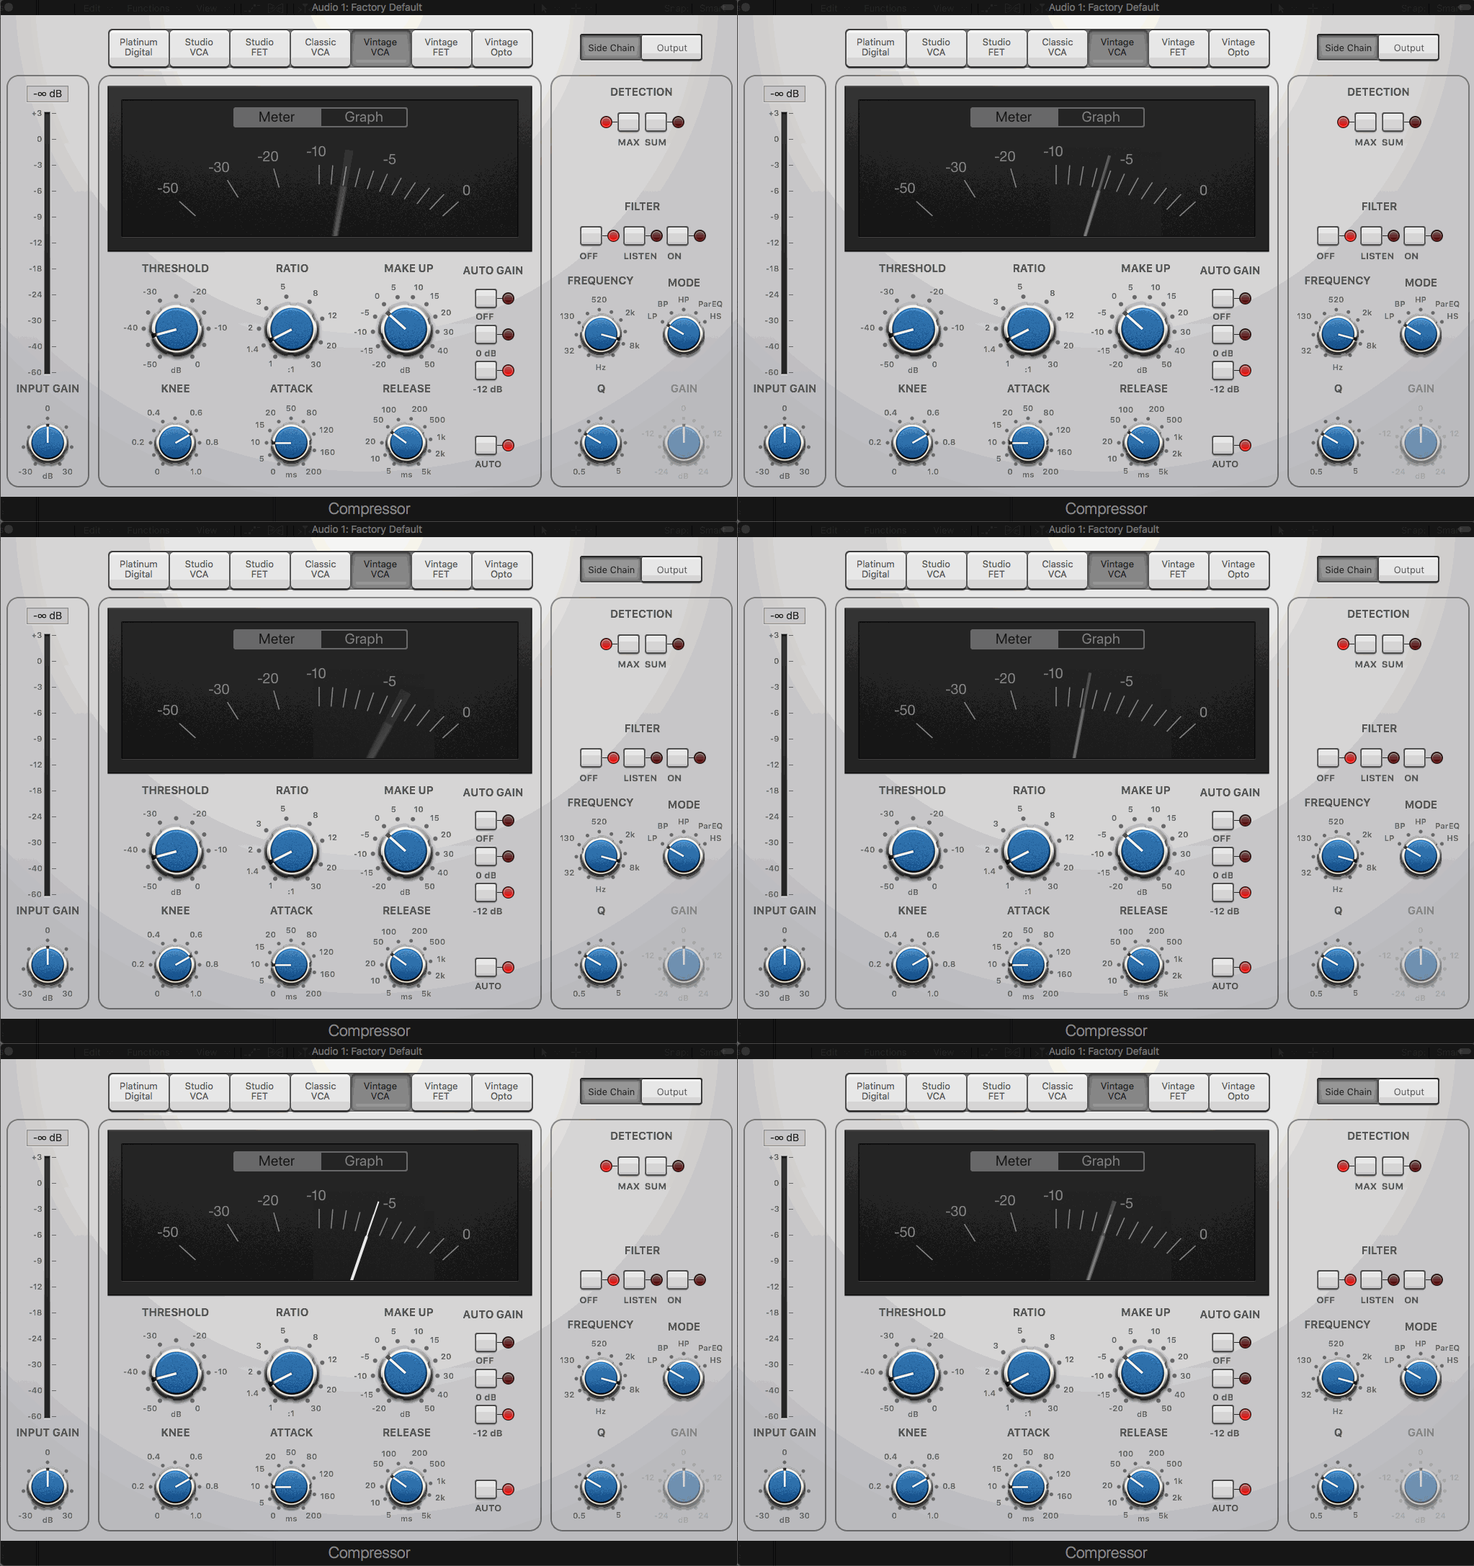
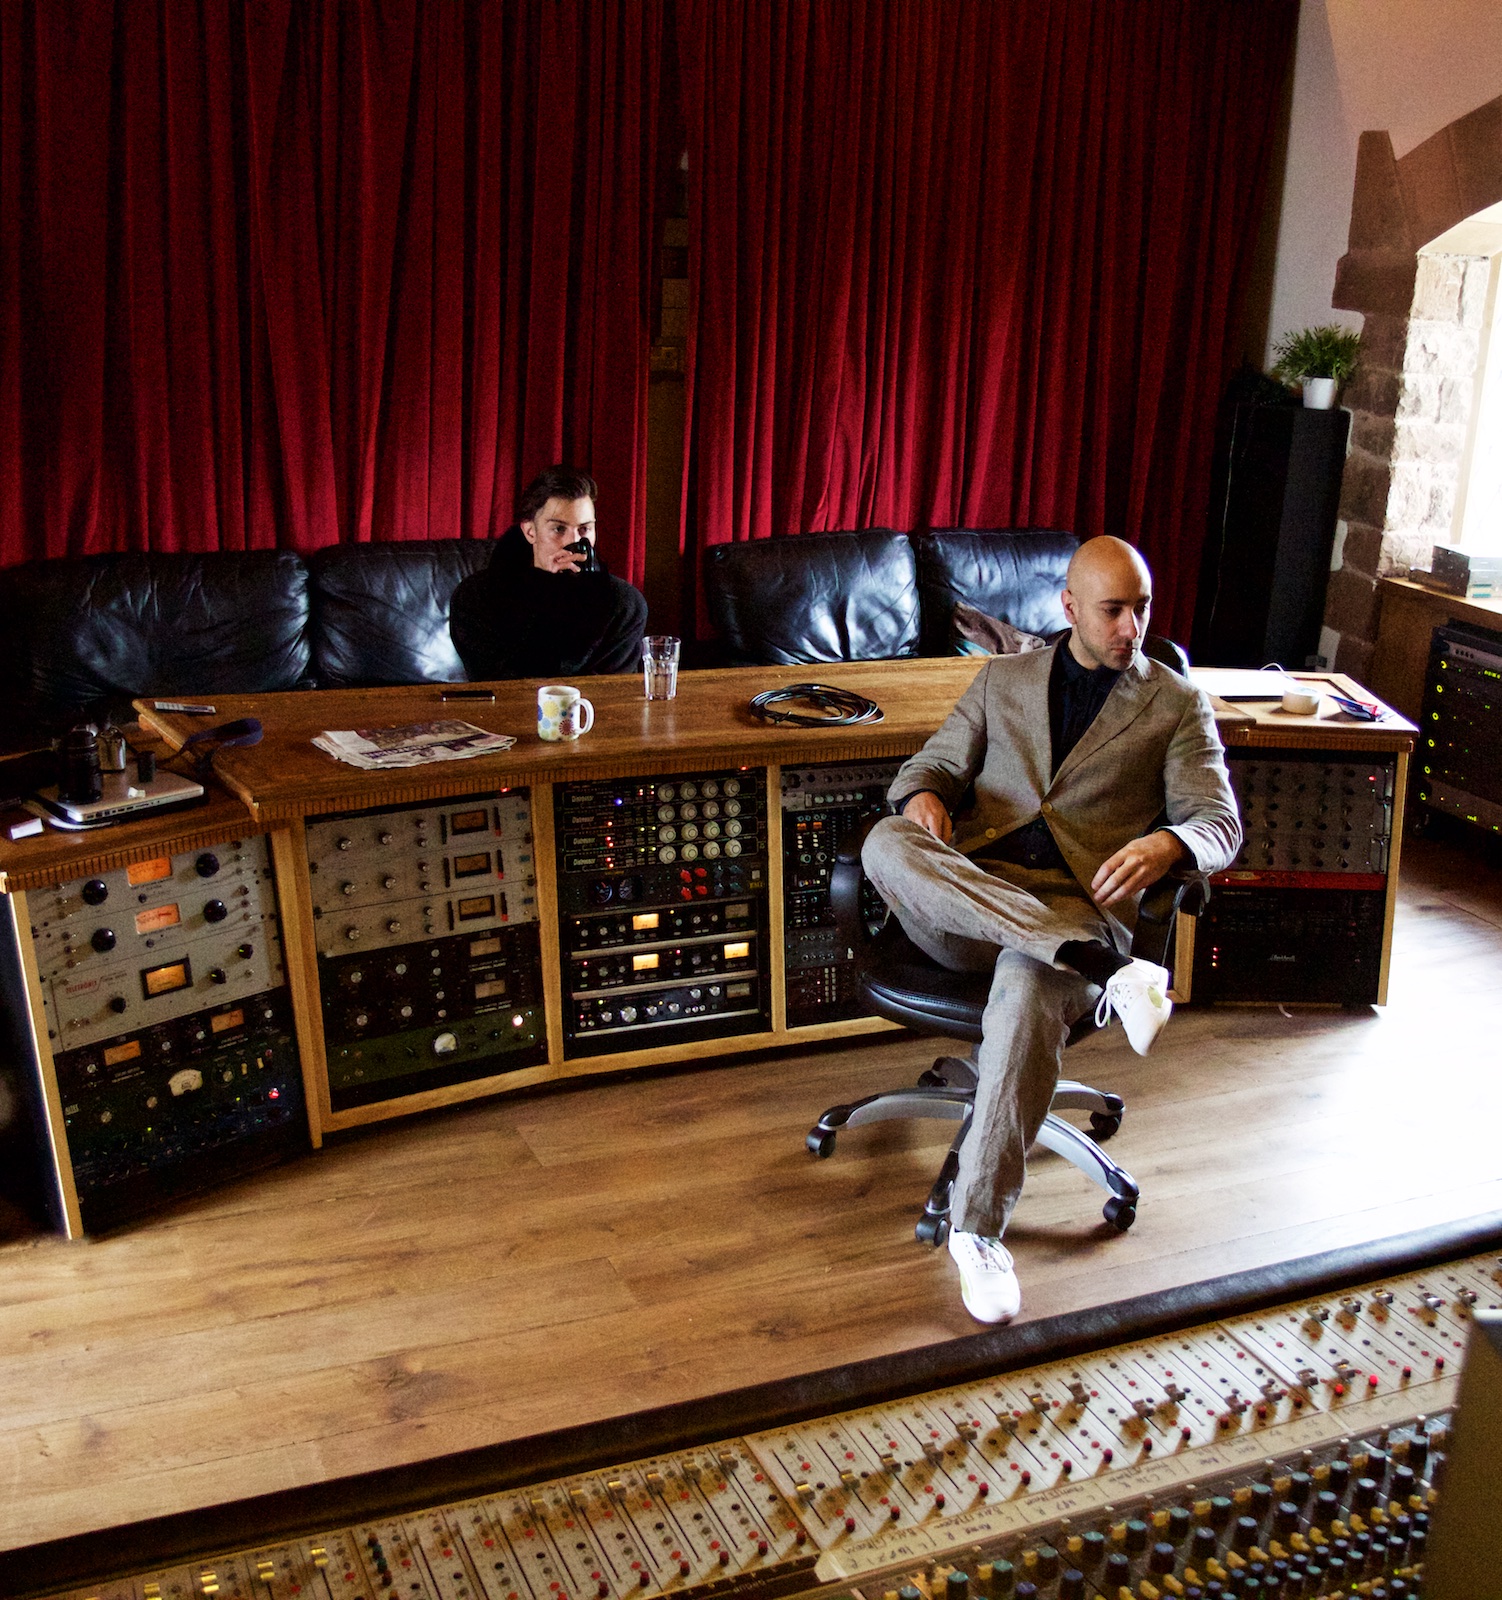
Random picture of a compressor I took at KONK Studios

Random picture of a compressor I took at KONK Studios

I was going to included a screen capture video of myself, following the process with the built-in Logic X compressor, to show you how quickly it can be done - then I thought, you know what? Nah - you do it. You know? Okay, PERHAPS I recorded it several times, only to realise it wasn’t capturing the screen audio and would be useless to everyone, but let’s pretend that this is a lesson in tough love and DIY ethic.

Anyway, once you have the attack set to your taste, you can move onto the release. Listen for when it’s too fast and there’s too much distortion, or when extreme pumping occurs. Once the release is set move onto the ratio, and finally back the threshold down to give a more reasonable amount of gain reduction, and then set the make-up gain. How does it sound?

This is a great trick to try when you’re using a new compressor for the first time, and want to get to grips with it learning how it sounds and behaves. Be sure to adjust the settings in the following order:

Attack -> Release -> Ratio -> Threshold

According to Stavrou, you shouldn’t ever really need to go back and change the initial settings you chose, unless you decide to go for a completely different aesthetic. It’s a great technique, so give it a try! Bear in mind that different compressors sound… different! Some of them will behave in quirky, non-linear ways that you may or may not like…

You could do all that, of course -  or you could just get me to mix it for you, which will, of course, sound quite wonderful. 😎

Next up, we’ll talk about serial compression - chaining these lovely things together in a row for further awesomeness and sonic beautification.

With love,

Ed 🎚🎛❤️
Boy Azooga 1, 2 Kung Fu Nominated for Welsh Music Prize

…which is nice. The full Welsh Music Prize 2018 shortlist:

Astroid Boys: Broke
Boy Azooga: 1, 2, Kung Fu
Bryde: Like an Island
Eugene Capper and Rhodri Brooks: Pontvane
Alex Dingley: Beat the Babble
Catrin Finch and Seckou Keita: Soar
Gwenno: Le Kov
Toby Hay: The Longest Day
Manic Street Preachers: Resistance Is Futile
Mellt: Mae’n Hawdd Pan Ti’n Ifanc
Gruff Rhys: Babelsberg
Seazoo: Trunks

My work was last nominated in 2013, for the Metabeats album ‘Caviar Crackle’ (which I recorded/mixed/mastered/produced, played on, blah blah, and so on and so forth) - you can check it out here, if you like: https://metabeatsmusic.bandcamp.com/album/caviar-crackle

(But no seriously, if you like hiphop go listen to that as it still bangs.)

With love and Azooga,

Ed 🎚🎛❤️

44069146_1940291082714234_2890038413501661184_o.jpg

New Music: BuzzardBuzzardBuzzard - Double Denim Hop

I’m over the moon to have had a small part to play in the creation (mastering) of this amazing, new track from my buddies BuzzardBuzzardBuzzard - the band so good, they had to name it three times (or something?). Wonderful video by the good folks @ On Par Productions.

You can listen here on Spotify or Apple Music or click the video below (he gets naked in it so you may as well).

They just returned from a UK tour with Goat Girl, and will be playing @ The Lexington on 28th November.

I’m quite sure that this is just the beginning of a wonderful future for them.... more to come soon….

With love,

Ed 🎚🎛❤️

New Boy Azooga - Do The Standing Still

Happy to reveal the latest Boy Azooga track that I recorded/produced/mixed and mastered (ooh la laa) - it’s a cover of The Table’s, comic book dead body dance floor classic ‘Do The Standing Still’.

The video (by Toby Cameron) features Kliph Scurlock, a polar bear and some confused members of the public. Have a good day. Long live The Table.

Catch the Azoogas on their UK and US tour on these dates - I’ll be at the Scala gig tomorrow (Weds 17th Oct).

With love and Azooga,

Ed 🎚🎛❤️


Behind The Scenes - Mastering Boy Azooga's '1, 2 Kung Fu' @ Electric Mastering

Where have you been? Busy I imagine. Me too, me too. I just checked my calendar and saw the date and remembered - to the day, it’s the one year anniversary of the official completion of the debut Boy Azooga album. By ‘official’ completion, I mean the final step of the music part of the process - the mastering - by Guy Davie at Electric Mastering, exactly one year ago today. How times flies!

I remembered that I had some short behind the scenes videos of the process, so what better time to post them? Twas a great day, can’t wait to get in back there again….

And just one year one and the band have a tour of the U.S. lined up for this November! You can find their live dates at boyazooga.co.uk/

Exciting stuff…

With love and Azooga,

Ed 🎚🎛❤️

New Boy Azooga Single/Video - Jerry

Hello there and good day to you - there is a new single and video out for the song Jerry off the forthcoming 1,2 Kung Fu! album (which you can pre-order here in lovely pink and/or blue vinyl). It's a song about a dog 🐶

The video was once again done by Toby Cameron of ON PAR Productions, shot at Cardiff Dogs Home, (please donate here) and the single is out on Heavenly Recordings. It will be available on your radio dials soon.

With love and Azooga,

Ed 🎚🎛❤️

Boy Azooga Debut Album Date Announced - 1, 2 Kung Fu!

Some more good news - I now can officially announce the release date of Boy Azooga's debut album '1, 2 Kung Fu!', out on July 8th on Heavenly Recordings!! You can pre-order a signed copy of the vinyl and/or CD here: http://heavenlyemporium.com/buy/12-kung-fu/

You can pre-order it on iTunes here: https://itunes.apple.com/gb/artist/boy-azooga/1300260976

The CD version will be signed too. The iTunes version will not because that's impossible.

Enjoy the lovely album artwork below and have a lovely weekend, won't you?

With love and Azooga,

Ed 🎚🎛❤️

27747746_1592807480767862_3296640779030967602_o.jpg

New Boy Azooga Single/Video - Longer Boogie!

So happy to finally show you another track from the Boy Azooga album I produced/recorded/mixed - one of my favourites - LONER BOOGIE!!! It's a song about how it's scary outside and sometimes you want to stay inside. You got the Loner Boogie. Gorgeous video by Toby Cameron of the mighty On Par Productions.

I do hope you enjoy?

With love and Azooga,

Ed 🎚🎛❤️

The Science of Art: Understanding Compression - Part III

OK, we're going to be talking about Side-Chain Compression. It sounds confusing but it's not at all. It's a relatively long post, but just imagine it's the olden days, when people read books and listened to vinyl and stuff. Everyone's obsessed with tape and vintage gear, but nobody wants to read an article full of lovely, free information? Come come now, you know your brain and music will thank you for it later.

Erm, anyway. Grab a coffee. Let's discuss.

Setting up side chain compression in Logic and selecting the kick as the input signal to turn down the bass guitar - but only when the kick hits

Setting up side chain compression in Logic and selecting the kick as the input signal to turn down the bass guitar - but only when the kick hits

7. Side-Chain Input: So, if we're using a standard compressor (as discussed so far) the level of the audio going into the compressor is used to control the amount of compression; the compressor detects the ‘volume’ of the incoming audio, decides if it’s over the threshold or not, reduces the gain of that audio, and then outputs it. OK, easy, we're on the same page.

Side-chain compression works similarly, but the compressor has two inputs: one is the signal to be compressed and the other signal is used to control the amount compression. The "side-chain" of the compressor is the part of the circuitry that listens to the incoming signal to see if it should tell the compressor to... compress.

This can help to create the 'famous ducking effect’ or pumping sound used in electronic music – the kick is used as the side chain input, acting on the bass to ‘duck’ the bass sound (or perhaps all the instruments, if you want) while the kick hits, and then the music comes back in after the kick, helping create rhythm and groove (if the release is set correctly).

This can be used to... ahem, artistic effect as above, or it can be used simply to create more headroom and allow instruments to 'get out of the way of each other' – for example, if the bass and rhythm guitars are playing during a busy section in a mix and masking the kick and the snare, they can be ‘ducked’ a little in order to allow the kick or snare to bang through the mix a little more easily, as well as creating a little more headroom on the master bus (bonus!).

A cool and slightly advanced trick is to 'duck out' the rhythm guitars (or anything playing at the same time as the vocals) so that they dip out when the singer starts to sing. Go wild - you can even try using side-chain compression with a multi-band compressor and only compress the mid-range of the rhythm guitars when the vocals kick in! You only need a few dB for it to be worth it.

Additionally, using the side-chain gives you another important tool - it allows you to filter the input signal separately, before it is fed to the compressor. Using hi-pass and low-pass filters (see attached pic of Logic X compressor) you can compress the input signal, but only when the threshold is exceeded in the range of, for example, 10Hz - 100Hz. This way, when the signal has contains transients outside this frequency range, the compressor doesn't react. Get it?

Obviously, the settings you have on the compressor (Attack, Release, Ratio, Threshold etc.) will affect the character of the 'ducking'. The Release time might be the most important one here, as that will control the 'breathing' effect. Experiment. Stick it on 4:1, set the Threshold to give you -10dB of compression (i.e. enough so that you can hear it) and then experiment with the Attack/Release. You might like the Attack at the fastest setting.

Some compressors have a side-chain listen button that allows you to check which frequencies you're using as side-chain input (see the above GIF). If you push this, you send the side-chain signal straight to the output. Listening to this can really help you understand what the hell is going on.

Here is a picture of some compressors that I took at a session at Real World. It's just here to spice things up a bit, you know? Otherwise it's just a lot of text and people don't wanna read stuff these days. We need distractions. Plus, I think it l…

Here is a picture of some compressors that I took at a session at Real World. It's just here to spice things up a bit, you know? Otherwise it's just a lot of text and people don't wanna read stuff these days. We need distractions. Plus, I think it looks better. Spruces the place up, like a nice throw, some cushions, or a nice lamp.

8. Compressor  Metering - PEAK vs. RMS: OK, so we know that each compressor uses a side-chain circuit to measure the incoming signal, so that it knows when it needs compressing – it asks: ‘is the signal at the threshold, yet?’. But the important part to remember is that the compressor will behave differently, depending on whether the side chain detector responds to the average level of the input signal, or to the max/peak signal level of the input. What?

Well, some compressors can switch between Peak Mode and RMS Mode operations (don't panic, don't close the browser) – in Peak mode, the compressor responds more accurately to brief peaks in the audio - this ensures transients are more accurately controlled, but also introduces a risk that the output will be overly compressed if there’s a sudden loud, sharp transient sound. So Peak metering is usually used on drum and percussion sounds.

Most compressors use an RMS mode. RMS stands for Root Mean Square... which is *clears throat*.... "a mathematical means of determining average signal levels, which is designed to respond similarly to the human ear". Using a compressor in RMS mode means that the compression can sound more natural, but sharp transient sounds may pass through at a higher level than you expect, even with a short attack time. A great tip when working with RMS mode compressors is to use a limiter after the compressor to catch the transients, but be careful not to squash too much of the dynamics!

In the picture at the top (the Logic compressor) the options are 'MAX' and 'SUM' - which is the same as 'Peak' and 'RMS' respectively.

That's all for now. If you need any clarification on anything, just get in touch and ask. I love talking about this stuff. Next time, we'll talk about how to find the ‘perfect’ compressor settings - every time. I don't mean that in a spammy, click-bait way, it's a method I was shown years ago and it's pretty cool.

With love,

Ed 🎚🎛❤️

The Science of Art: Understanding Compression - Part II

Continuing from Part I where we discussed the Threshold, Ratio, Attack, and Release, this post is mainly about the Knee. It's a bit of a weird one, really - it's not a setting on all compressors and people can get it confused with its relationship to the Attack time. We'll also look at Make Up Gain. To start, here is a nice picture of a compressor:

I changed the picture to the white SSL clone compressor in Logic X and made it into an animated gif because I was worried that simply posting factual information would be too bland for the general public to consume. Needed to make it more flash to a…

I changed the picture to the white SSL clone compressor in Logic X and made it into an animated gif because I was worried that simply posting factual information would be too bland for the general public to consume. Needed to make it more flash to attract the moths. The barracudas.

So what the hell is the Knee and how can it be 'hard' or soft'?? Let's discuss:

5. Knee: This is how quickly the compressor ramps up to the full compression ratio.

With a hard-knee compressor, the signal is completely unaffected until it goes over the Threshold; from the Threshold on up, the signal is compressed according to the Ratio, and the full amount of gain reduction is applied as fast as the Attack time will let it.

A soft-knee means that the compressor will slowly ramp up the compression Ratio as the signal approaches the Threshold. Another way to think of it is that the Threshold is ‘spread out’ over a wide range and it gradually compresses more and more as the signal gets ‘hotter’. With a soft-knee compressor, once the signal passes the Threshold, the full Ratio that you set is applied, but because some compression is applied to signal as it's approaching the Threshold, the transition from no gain reduction to full gain reduction is smoother. The result is more transparent, less obvious compression (so, it can also seem harder to tell when the compressor is engaged and when it isn’t).

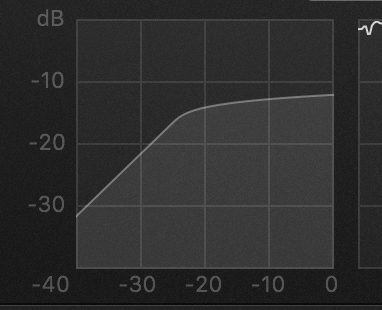
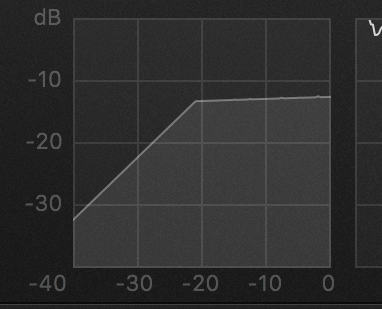
Check out the animation up on the right. This picture shows the settings on a compressor - the vertical axis represents the volume in dB - the horizontal axis represents the Threshold. On the horizontal axis, you can see that the threshold is set to around -21dB (so the compressor will kick in once the signal goes over -21dB). In one picture, there's a sharp fall off in gain, but on the other, there's a gentle curve, more of a transition. All that's happening here is that I'm changing the knee from hard (sharp transition), to soft knee, so there's a more gradual ramping up of the compression. You can see that in the 'soft knee' example, the curve actually starts before the threshold of 21dB, so you'll get some compression happening before -21dB on the meters! However, I didn't touch the Threshold setting when making this picture.

Some compressors give you the option of varying the Knee setting, and some don’t – in any case, experiment with what sounds good to your ears!

I find that a soft knee is nice on 'slower' instruments, so some bass, vocals, piano. Hard knee is great for things like drums or more percussive guitar, rap vox etc. But there are no results - I've used soft knee on drums and hard knee settings on vocals all the time. just mess with it a bit, see if you can hear a difference, and leave it where you think it sounds best. That's it.

A compressor I absolutely love is the DBX 160XT - this compressor doesn't give you any Attack and Release controls (partly why I love it - two less things to think about) but it DOES give you a 'hard knee' (the default) and a 'soft knee' setting (called 'Overeasy' mode) to give you a little control over how 'aggressive' the compression is. But does that mean that the a soft knee is the same as a slower attack? NAH MATE.

So how is the Knee different from the Attack Time?

Remember - the Knee has nothing to do with Attack or compressor timing (if the compressor’s Attack is set to 20ms, it will always be 20ms), the Knee has to do with varying the compression Ratio before the Threshold.

To illustrate, think of a compressor set with a 4:1 ratio, using a soft knee, with a threshold set to -10dB. So, when the signal reaches a level of -10dB, the compressor will be operating at a ratio of 4:1. But before the signal gets to -10dB, the Ratio will slowly increase. So, the compressor may behave something like this:

    •    When the audio signal's at -14dB, the compression ratio is 2:1
    •    When the audio signal's at -12dB, the compression ratio is 3:1
    •    When the audio signal's at -10dB or higher, the compression ratio is 4:1

At -10dB or higher, the full compression Ratio is applied. Of course, in reality, the Ratio wouldn’t jump up in such large amounts, but would be a gradual ramping up to 4:1.

If a hard-knee compressor were being used, there simply wouldn’t be any compression occurring at all until the audio had gone over the Threshold. With the soft-knee enabled, the compressor starts compressing as the signal approaches the Threshold.

So whatever the Knee setting or the current compression Ratio, the compression is still applied after how however long the attack time is set to!

Next up - once you've compressed the signal, it's really quiet. How do you get it back up to the volume it was at? Simple...

6. Make Up Gain: This is used to ‘make up’ the volume of the audio after the peaks have been compressed. Be careful not to be fooled by volume – we always think louder is better. Make sure to always check the real difference that the compression makes by setting the make-up gain so that the peak volume of the audio stays the same when you bypass the compressor. Bypass the compressor and switch back and forth between the compressed and uncompressed audio and listen for the difference, and decide which you prefer. You might be surprised that you prefer the original signal!

Q: If I’m getting 8dB of Gain Reduction and I use 8dB of makeup gain, why doesn’t the output level always match the input level – why is the output louder?

If you’re compressing a signal with sharp transients, and attack time is greater than 0ms, you’re letting the peak transients through and then adding the compressed tail and make up gain on top of that! You can’t always simply add 8dB of make up gain if you’re getting 8dB of gain reduction. Just use your ears, and check the meters too.

If you have any questions at all about any of this, or want to inquire about me mixing/mastering some of your music - just shoot me a email! We can even do a Skype/FaceTime Lesson to talk about this stuff if you like, it's all good fun.

OK, until next time, where we'll look at Side-Chaining and Peak/RMS metering...

With love,

Ed 🎚🎛❤️

The Science of Art: Understanding Compression - Part I

Yeah, we know that compressors 'reduce the dynamic range of the audio that’s passed through it blah blah' and yeah, they’re 'used in every mix blah' but they’re still one of the most misused and misunderstood effects available, and can be a bit daunting. Still, they are definitely the coolest sounding of all the gizmos.

So. I've written a series of posts that cover the basics of what each compressor setting does, gives you a quick tip on how to always set the ‘correct’ compressor settings, and gives you an introduction into a more advanced compression techniques like 'Serial Compression'. These are basically just the facts I wish I'd had when I was trying to understand how to use compression. I know there are YouTube tutorials and articles written on this already, but I intentionally wrote this to be a nice reference that you can refer back to when you feel that twinge of insecurity about setting one of those knobs. Once all parts of the series are out, I'll put it together in a free PDF that you can download and keep on your desktop. If you like, you can print it out and give it to your loved ones as a gift. You know, if you want.

If you want clarification on anything, just let me know and I'll find another way to explain it.

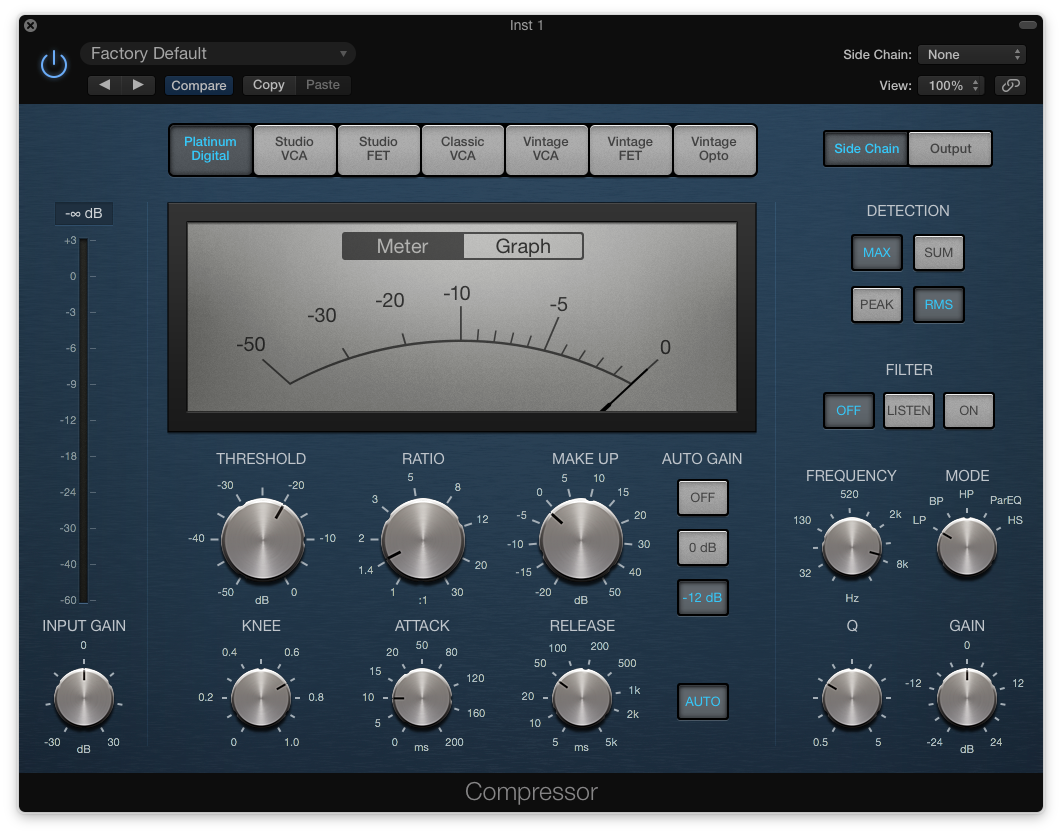
The stock Logic X compressor, which in all honesty I only ever use if I want to do some side-chain compression. It's probably because it's blue and a bit boring looking. Yes, I know the VCA, FET etc changes the colour, but it's too late for all that…

The stock Logic X compressor, which in all honesty I only ever use if I want to do some side-chain compression. It's probably because it's blue and a bit boring looking. Yes, I know the VCA, FET etc changes the colour, but it's too late for all that at this stage. My mind is made up.

Let’s recap the basics in 'real language' that normal people use - refer to the pic above to jog your memory of the common parameters. OK, let's go through what all (well, most) of those knobs do, yeah?

1. Threshold: The level (in decibels) at which compression kicks in. So, once the audio level goes above (is louder than) that level, compression kicks in and starts to make the audio quieter (assuming the ratio is above 1:1). Changing this has the biggest impact on how much compression is happening.

2. Ratio: This is just a way to explain how much the compressor is reducing the level of the audio; it’s the ratio of gain reduction between the output and the input. So, a 2:1 ratio means that once the signal goes above the threshold, the audio is reduced by half – so if the signal is 2dB over the threshold, the signal is reduced to 1dB. If the signal is 10dB over the threshold, the signal is reduced by 5dB. Ratios of 10:1 (or higher) approach limiting – a 10:1 ratio results in a 90% reduction in size!

3. Attack: This is the time it takes for the compressor to start compressing once the audio goes over the threshold that you set - set it too short and you’ll lose the ever-important transients (of course, maybe that’s what you want!). For most occasions, try to make sure that your attack time is long enough to let ‘enough’ of the transient pass through, especially on a drum bus. On the master bus or a drum bus, I like longer attack times like 30ms (with an SSL-style Bus Compressor for example, the slowest setting), so that the kick can come through and isn't 'clamped down' or becomes too thin.

4. Release: How long it takes for compression to stop once the signal is below the threshold. Setting this too fast can result in distortion (which can be cool) - too slow and you’ll run into pumping (or breathing). Pumping occurs when the compressor’s release time is long enough so that when the input signal is once again above threshold the threshold, the compressor is still acting and the incoming signal is compressed more than the previous transient (you might need to read that a couple of times). This causes the overall loudness of your track to fade in and out, creating a pumping effect. It generally doesn't sound great.

You may well find that using the same Attack and Release settings on different compressors sounds wildly different – so be sure to set these using your ears. Or the method that I'm going to outline very soon... 😎

With love,

Ed 🎚🎛❤️

Recording Nyckelharpa @ State Of The Ark

I spent a few days last week recording the wonderful Vicky Swan playing her Nyckelharpas @ State Of The Ark studios in Richmond. It's a traditional Swedish instrument that is a bit like a Cello or a Viola, (and is bowed), but has  keys which kind of act like frets (and make a cool cuh-CLUNK sound). Here's a snippet of what a Cello 'harpa sounds like 'in the room', and then a short video showing the cello tracked along with the viola. Enjoy!

Ed 🎚🎛❤️